Settings overview
Settings is where you configure the store itself — how you get paid, how you ship, who's on your team, what domain you use. It's a hub of sections; this page maps them so you can jump to the right one.
Where to find it
Sidebar → SETTINGS → Settings.
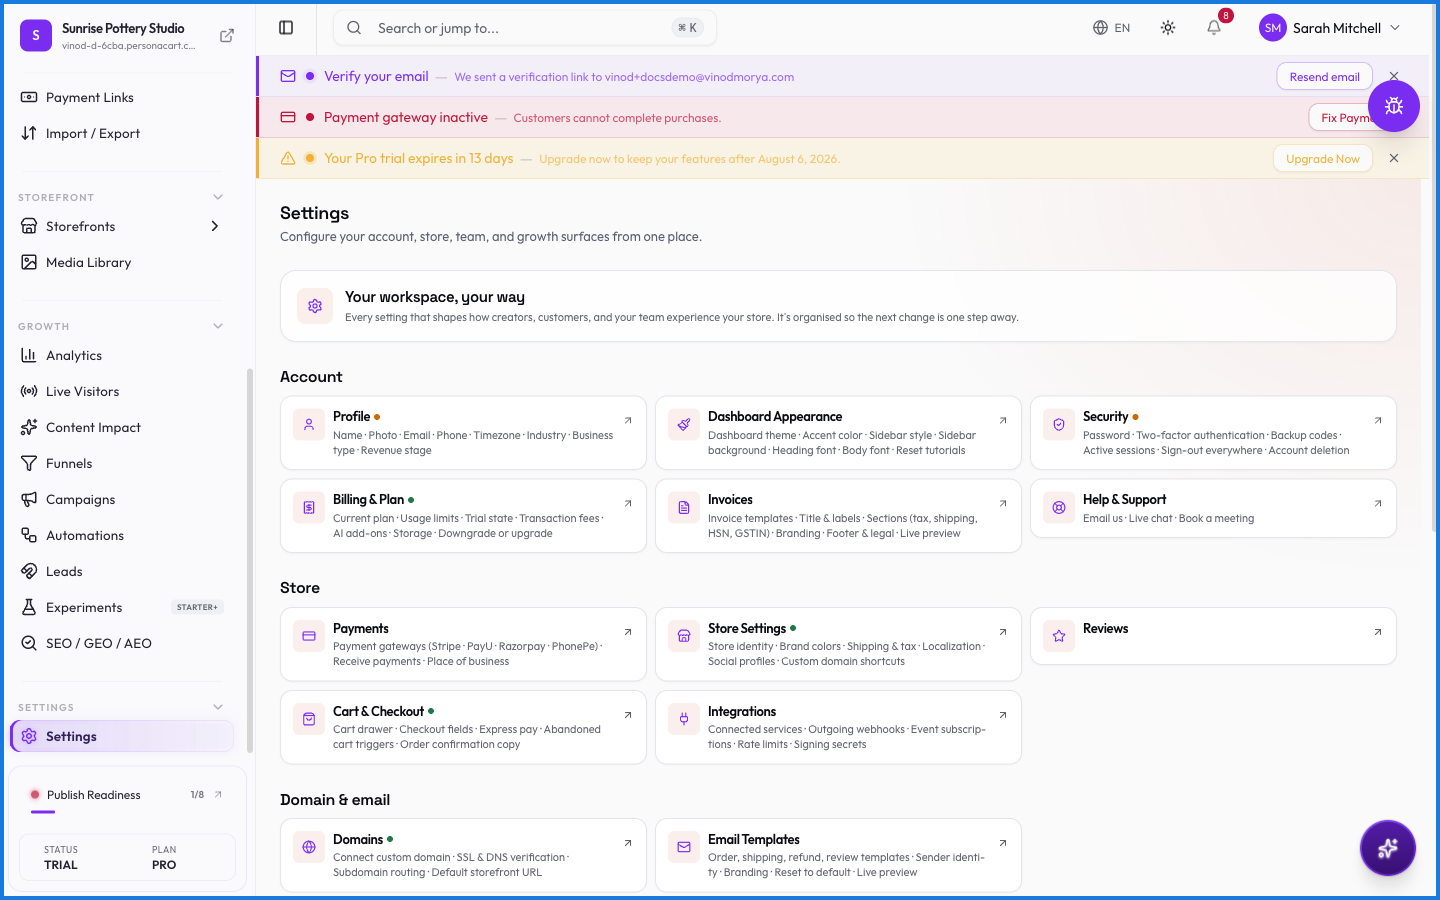
The sections these docs cover
- Billing & plans — your subscription, invoices, and upgrades.
- Brand — store identity, logo, and name.
- Payments — connect Stripe or another gateway; switch test to live.
- Shipping — rates and zones for physical goods.
- Taxes — how tax is handled on your sales.
- Team — invite people and set their roles.
- Domains — attach a custom domain with SSL.
- Integrations — connect outside services.
- Notifications — the emails your store sends.
- Cart & checkout — the buyer's checkout experience.
There's more here too — profile, security, invoices, reviews, webhooks — reachable from the same hub.
What happens — and what doesn't
- Settings are per store — each storefront you run has its own configuration.
- Some settings (like a gateway) gate real selling; the dashboard nudges you toward the ones you still need.
- Changing your place of business isn't here — that's fixed at signup.
Where do I connect a payment method?
Settings → Payments. Connect your gateway (like Stripe) there, and switch it from test mode to live when you're ready to sell.
Are settings shared across my stores?
No. Each store has its own settings — billing, payments, team, domain, and the rest are configured per store.
Every field on this screen
Every field across the smaller settings screens — localization, meetings, and alerts. Read straight from the live app, so it matches what you see.
| Field | Type | What it accepts | What it does |
|---|---|---|---|
| API Key | Text | — | e.g. WhatsApp Business API key |
| Auto-create meeting for all bookings | On/off | — | |
| Banner text | Text | — | |
| Confirm New Password | Text | — | e.g. Confirm new password |
| Confirm new password | Text | — | |
| Confirm your password | Text | — | e.g. Enter current password |
| Cookie Consent Banner | Number | — | |
| Cooldown (min) | Number | — | |
| Countries | Text | — | |
| Customer Email | Dropdown |
| Choices: Personal Data Export (GDPR)All data for this customerOrder History ExportData Deletion (Right to Erasure)e.g. [email protected] |
| Data Retention (days) | Number |
| |
| Date format | Dropdown | — | |
| Default Currency | Dropdown | — | Choices: USD — US DollarEUR — EuroGBP — British PoundCAD — Canadian DollarAUD — Australian DollarJPY — Japanese Yen |
| Default Language | Dropdown | — | |
| Default Provider | Choice | — | |
| Delay before enabling | Text |
| |
| Display frequency | Dropdown | — | Choices: Once per sessionOnce per dayOnce ever |
| GDPR Compliance Mode | On/off | — | |
| Include meeting link in calendar invite | On/off | — | |
| Include meeting link in confirmation email | On/off | — | |
| Language | Dropdown | — | |
| Lookback (min) | Number | — | |
| Market Name | Dropdown | — | |
| Message Body | Long text | — | |
| New Password | Text | — | e.g. Enter new password |
| Operator | Number | — | |
| Password | Text | — | e.g. Enter your password |
| Phone Number | Text | — | e.g. +1234567890 |
| Product | Dropdown | — | |
| Rating | Dropdown | — | |
| Reason (optional) | Long text | — | e.g. Describe the reason for this request... |
| Request Type | Long text | — | |
| Show when < | Number |
| |
| Store timezone | Dropdown | — | |
| Template Name | Dropdown | — | |
| Threshold | Number | — | |
| Trigger | Long text | — | |
| WhatsApp Business API key | Text | — | |
| — Select language — | Dropdown | — |
39 fields, read from the live app. Which ones you see depends on the product type and your plan.
What this screen looks like in every state
| State | When you'll see it | What you see, and what to do |
|---|---|---|
| Loading | The screen is fetching your data | A skeleton in the shape of the finished page. It should be brief — if it persists, the load has failed rather than stalled. |
| Error | The data couldn't be loaded | A message with a retry. Retry first: most of these are a dropped request, not a broken store. If it repeats, the outage is upstream and reloading won't help. |
| No access | Your role doesn't include this screen | A permission notice instead of the page. An owner or admin can grant access under Settings → Team. |
When something goes wrong
These are the messages this screen can show you, and what each one means.
| If you see | What to do |
|---|---|
| At least one payment method must remain enabled | The payment provider rejected it. Check your gateway connection under Settings → Payments. |
| Copy failed — please copy manually | Retry the action. If it keeps happening, contact support with what you were doing. |
| Copy failed — select the URL manually | Retry the action. If it keeps happening, contact support with what you were doing. |
| Could not start Stripe onboarding. Backend returned no authorization URL. Please try again or contact support. | The payment provider rejected it. Check your gateway connection under Settings → Payments. |
| Could not switch Stripe environment. Please try again. | The payment provider rejected it. Check your gateway connection under Settings → Payments. |
| Enter your test or live credentials first. | Do what the message asks, then try again — it names exactly what's missing. |
| Failed to disconnect. Please try again. | The change didn't save. Retry — if it keeps failing, the request isn't reaching the server. |
| Failed to generate Stripe link | The payment provider rejected it. Check your gateway connection under Settings → Payments. |
| Failed to save | The change didn't save. Retry — if it keeps failing, the request isn't reaching the server. |
| Failed to update auto-convert setting | The change didn't save. Retry — if it keeps failing, the request isn't reaching the server. |
| Failed to update payment method | The payment provider rejected it. Check your gateway connection under Settings → Payments. |
| Please fix the tax-ID format errors before saving. | Do what the message asks, then try again — it names exactly what's missing. |
| You set … as the active mode but did not enter … credentials. | Retry the action. If it keeps happening, contact support with what you were doing. |